MCP server tutorial: deploy your first MCP server
A step-by-step MCP server tutorial: install the gxmesh CLI, build an MCP server with one tool in Go, TypeScript or Python, deploy it and connect a client.

In this post
- Install the gxmesh CLI on macOS, Linux or Windows
- Start a project and add a tool in Go, TypeScript or Python
- Push it and connect an MCP client
This tutorial builds an MCP server with one tool and deploys it in about ten minutes. Glxymesh hosts the server, so you don't run one yourself. A tool is a tool.yml that describes it, plus one run function in Go, TypeScript or Python if it needs code. You push the project; the platform builds it, runs its tests and serves it from one authenticated endpoint.
Install the CLI#
The gxmesh CLI starts projects, runs them on your machine and deploys them. Pick your system:
$ curl -fsSL https://platform.glxymesh.com/install.sh | bashPS> irm https://platform.glxymesh.com/install.ps1 | iexSign in and create a project#
Sign in, choose your organization, then create the project that will hold your tools. A project is one MCP server, with its own tools and secrets.
$ gxmesh login
$ gxmesh org use
$ gxmesh project create helpdesk
Start the project and add a tool#
Make a folder for the project, pick its language, and add a tool. You get a tool.yml and a code file to edit in any editor.
$ mkdir acme-helpdesk && cd acme-helpdesk
$ gxmesh init --lang node --project helpdesk
$ gxmesh new list-open-issues
Deploy#
gxmesh dev serves the project on your machine as an MCP server. When it works, push it: the platform builds it, runs the tests in each tool.yml, and puts it live only if they pass.
$ gxmesh push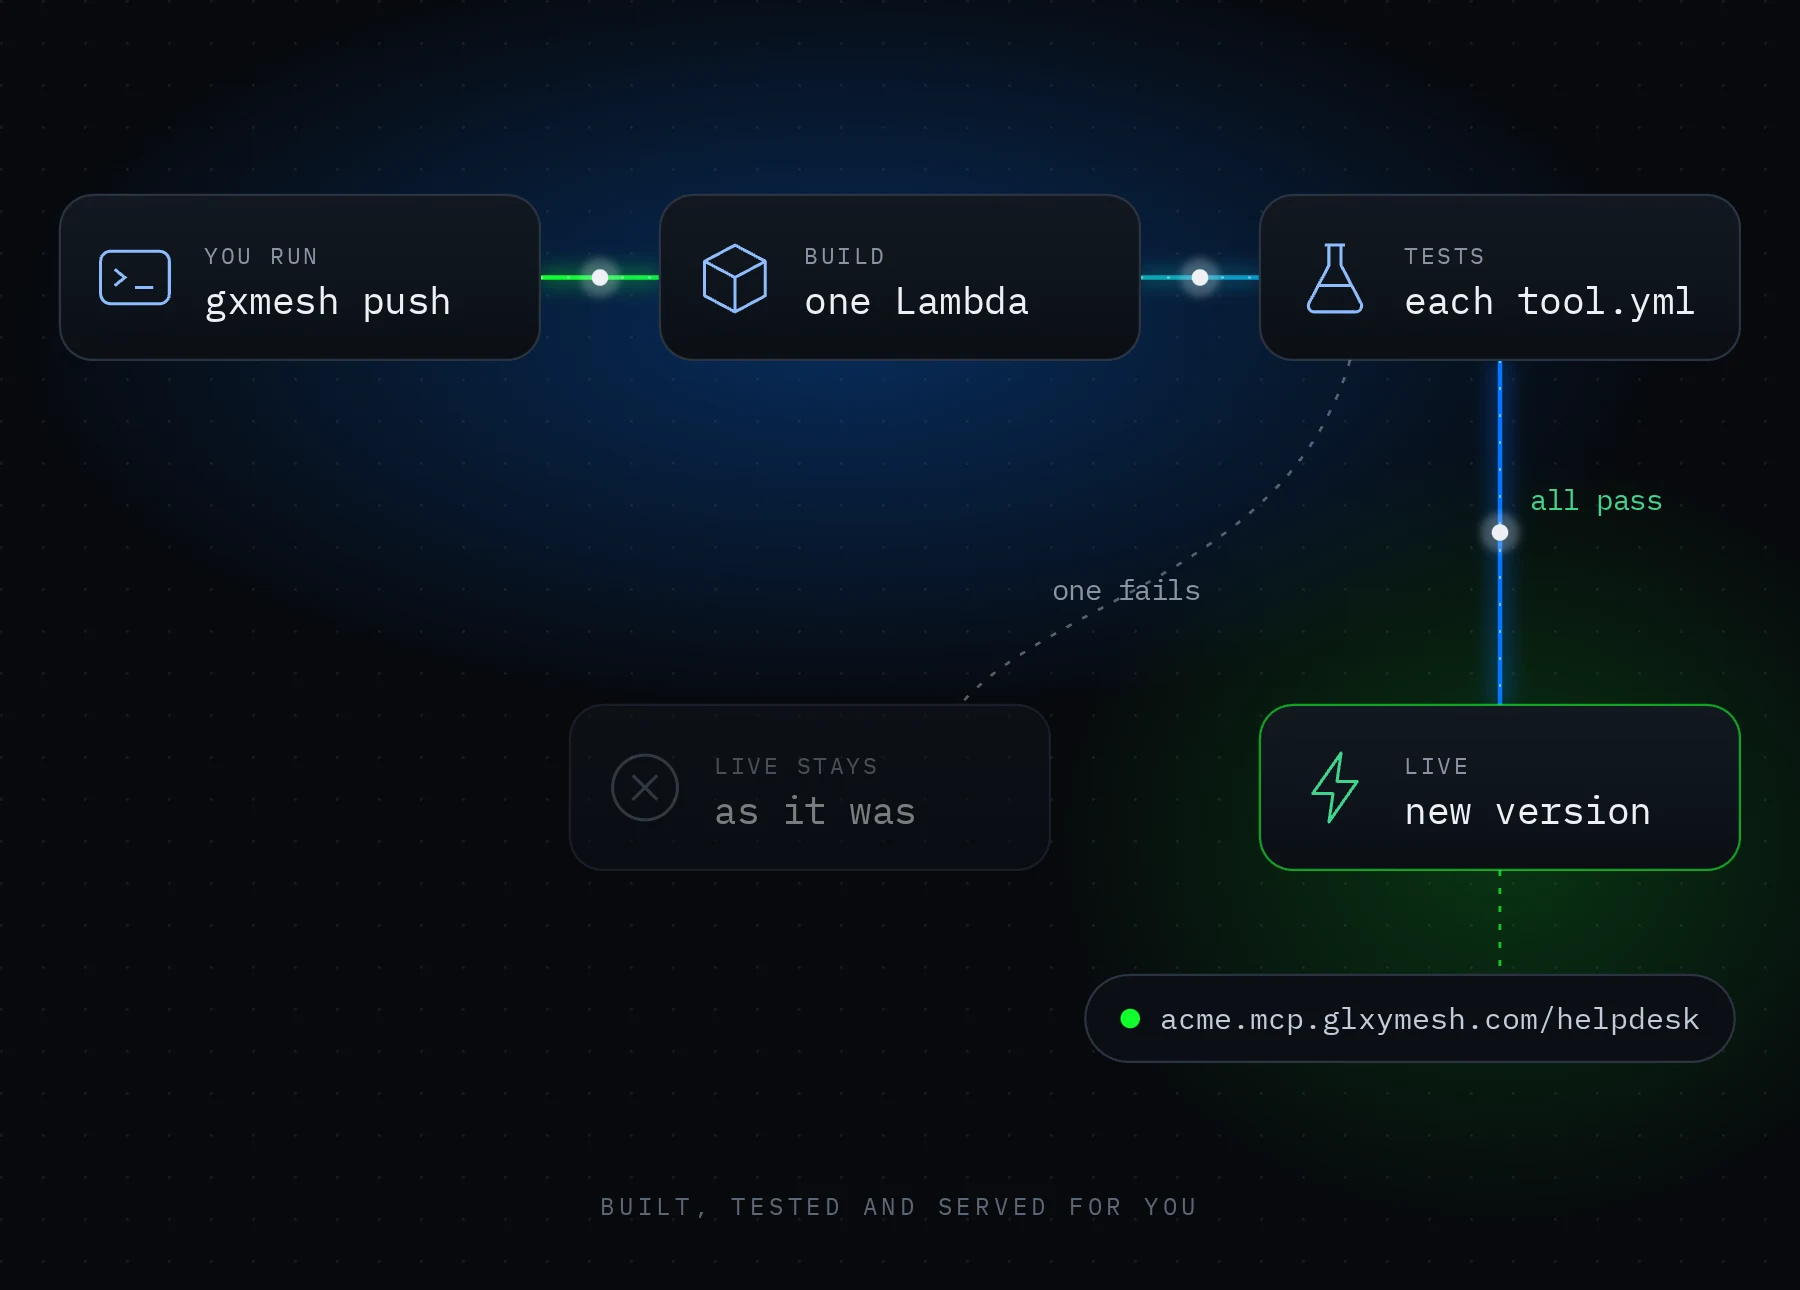
Connect a client#
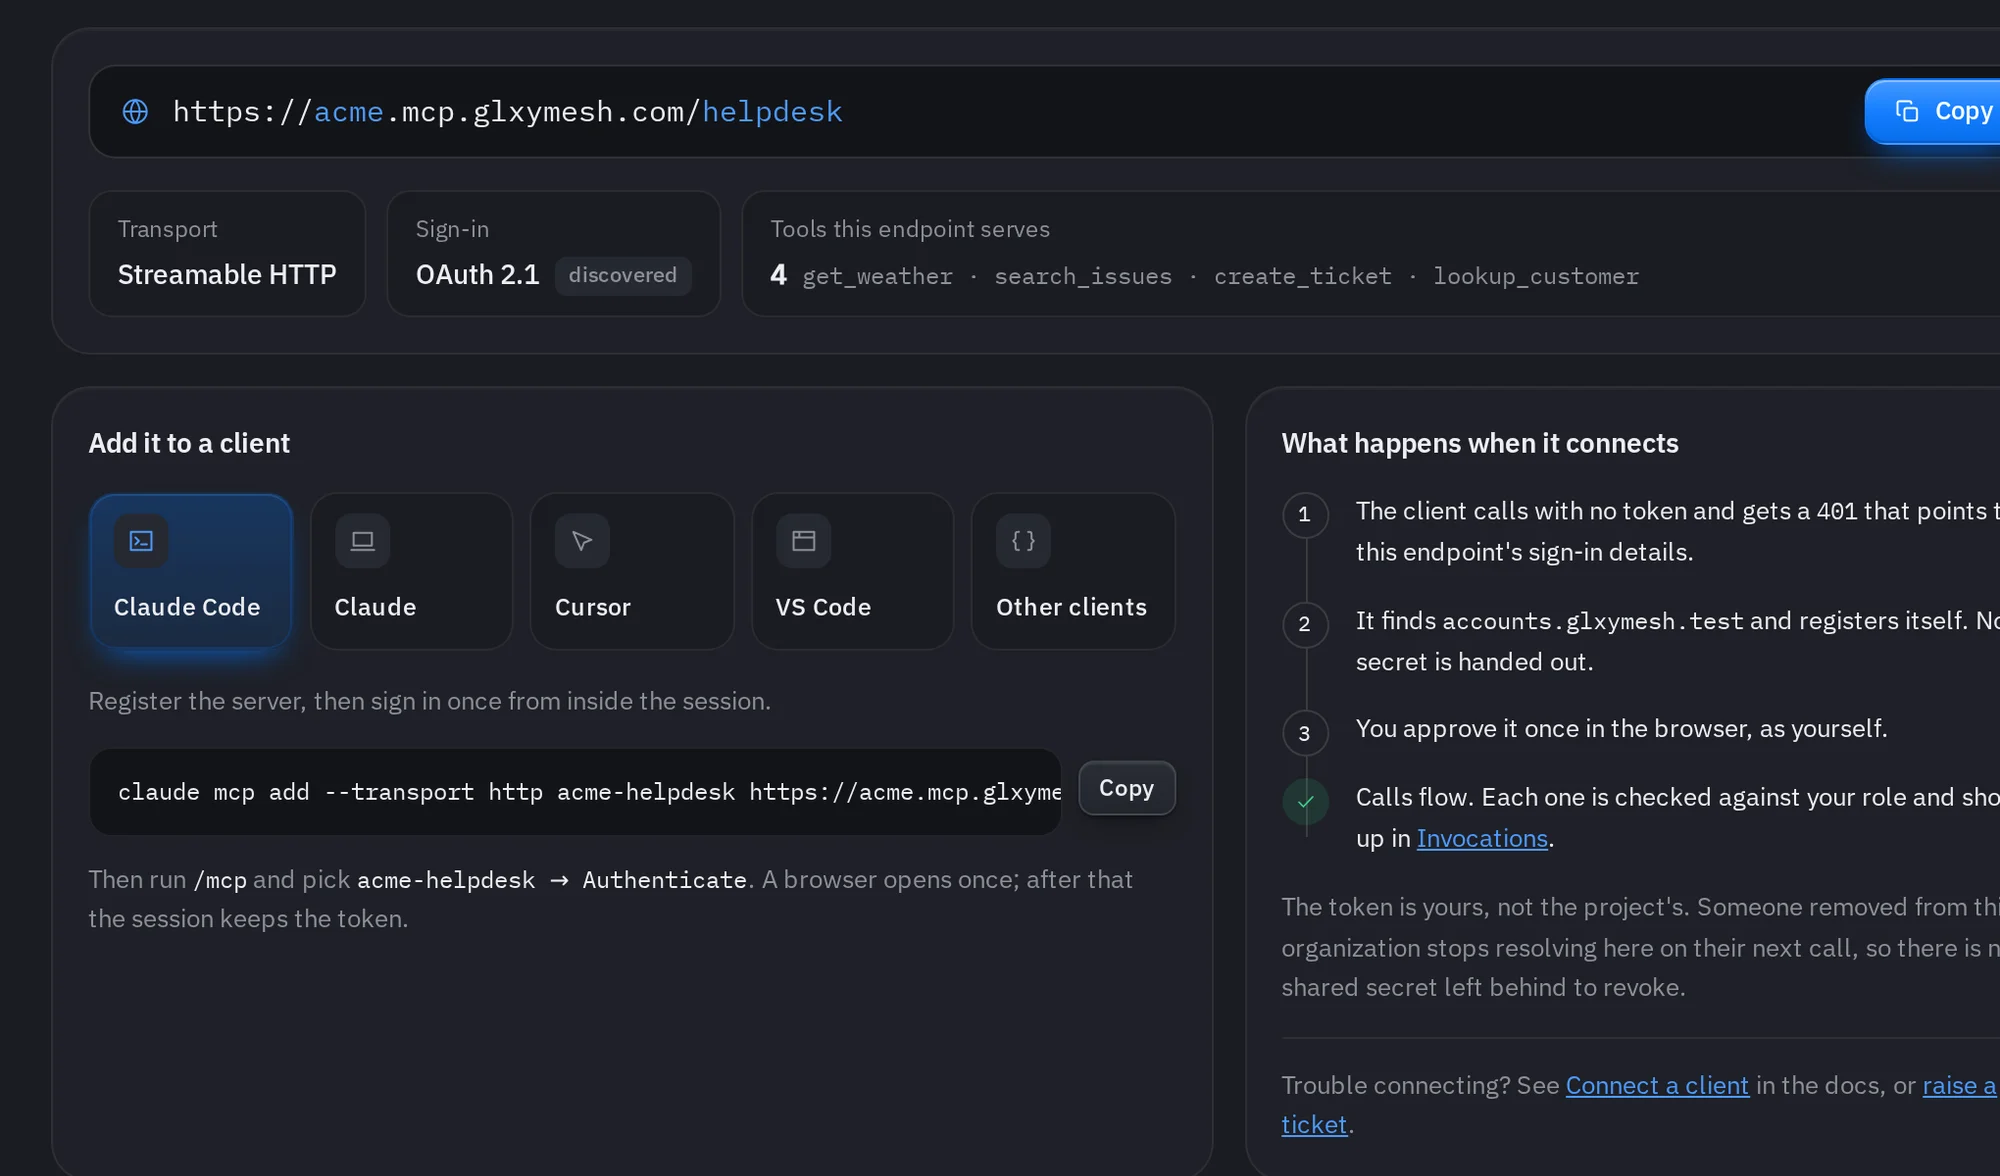
gxmesh connect prints your project's address and the command to add it to Claude Code, Cursor and other clients. The console's Connect page shows the same.
| Command | What it does |
|---|---|
| gxmesh init | Starts a project in this folder |
| gxmesh new | Adds a tool |
| gxmesh dev | Serves the project on your machine |
| gxmesh push | Builds, tests and deploys it |
| gxmesh connect | Shows how to connect a client |